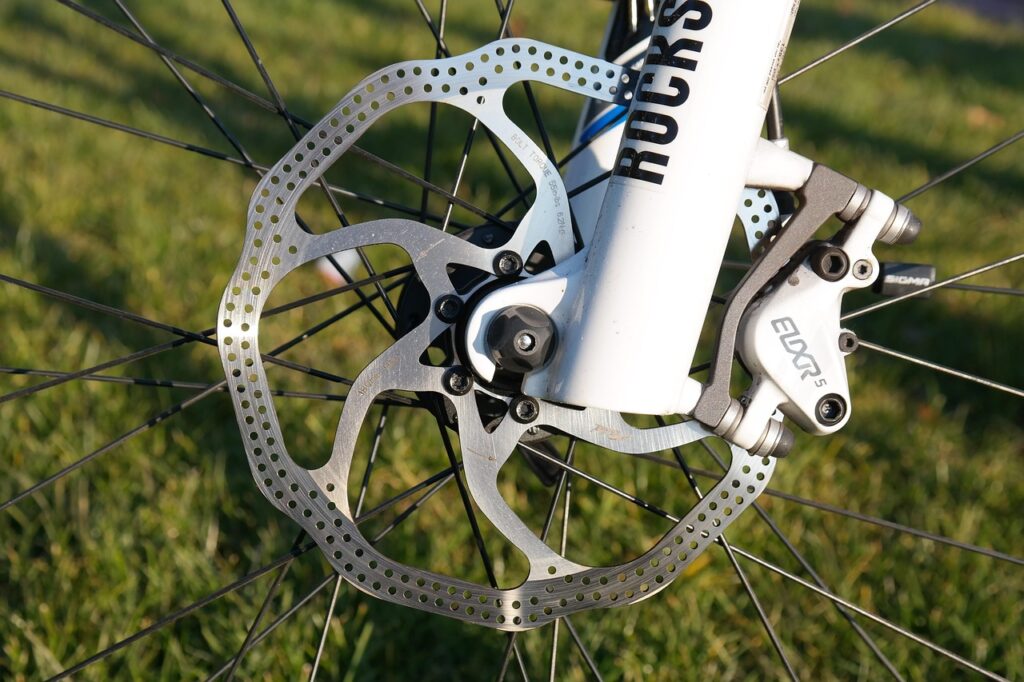
Understanding Mountain Bike Disc Brakes
Mountain bike disc brakes are an absolute game-changer when it comes to stopping power. Unlike traditional rim brakes, they work independently of the wheel’s rim, making them more effective in various conditions, such as rain and mud. Just imagine flying down a technical trail and needing to stop quickly; good disc brakes can be the difference between a smooth stop and an unexpected tumble.
Why Adjusting Brakes is Important
Brakes can be fickle and might not always perform at their best out of the box. Regular adjustments ensure your brakes feel consistent and responsive. And let’s face it, feeling confident in your braking system can turn a decent ride into an exhilarating one.
Signs Your Disc Brakes Need Adjustment
- Noise: If your brakes are making a squealing or grinding sound, it’s probably time for a check-up.
- Pulling: If your handlebars pull to one side when squeezing the brakes, that’s a clear indicator of misalignment.
- Soft Feel: If you feel like you have to pull the lever all the way to the handlebars to stop, that’s not a good sign.
- Wobbling: If your bike shakes during braking, your rotor might be warped.
Tools You’ll Need
Before getting started, gather your tools. A well-prepared shop can make all the difference. Here’s what you might need:
- Bike stand or something to hold your bike steady
- Hex wrenches
- Flathead screwdriver
- Torque wrench
- Clean rags
- Brake cleaner
- New pads (if required)
- New rotors (if required)
Step-by-Step Brake Adjustment Process
1. Inspect the Brake Rotors
Your rotors should be straight and true. To check if they are warped, spin the wheel and observe the rotor as it passes the brake pads. If you see it wobbling, it might need adjustment or replacement. A warped rotor can really mess with your ride.
2. Check Brake Pads
Inspect your brake pads for wear. If they look thin or unevenly worn, it’s time for a replacement. Remember, a good pad is essential for optimal performance.
3. Adjust the Brake Caliper
If you notice any pulling from the brake lever, you may need to align the caliper. To do this:
- Loosen the bolts that attach the caliper to the frame slightly.
- Squeeze the brake lever to center the caliper over the rotor.
- While holding the lever, tighten the caliper bolts back up. Make sure they’re snug, but do not overtighten.
This method allows the caliper to self-center while applying the brakes.
4. Adjust the Brake Lever Reach
If the distance between the brake lever and the handlebars does not feel right, you can adjust it for comfort. Find the reach adjustment screw, usually located near the pivot of the lever, and turn it using your flathead screwdriver. It’s all about personal preference—find what feels good for you.
5. Bleed the Brakes (If Necessary)
If your brakes feel spongy and you’ve checked everything else, bleeding might be the solution. This involves removing old fluid and replacing it with new, ensuring that no air bubbles impede brake performance. You will need a bleed kit for this. Follow these steps:
- Attach the syringe to the bleed port.
- Open the bleed screw to let the old fluid out.
- Inject new fluid while keeping an eye on the syringe.
- Close the bleed screw before disconnecting to avoid spills.
This can be a bit messy, so wear old clothes and maybe put down some newspaper.
6. Test Ride
Once you’ve finished adjusting, it’s time to take your steed for a spin. Find a safe area to test your brakes. Drop into a hill and squeeze those levers!
Maintenance Tips for Optimal Brake Performance
To keep your disc brakes performing at their best, regular maintenance is key. Here are some handy tips:
- Keep it clean: Dirt can wear out pads and rotors. Make a habit of cleaning often.
- Monitor pad wear: Check your pads every couple of rides, or whenever you notice inconsistent braking.
- Weather check: After a muddy or wet ride, inspect your brakes for water and grime.
- Rotor attention: If you’re getting noise or poor performance, inspect your rotors regularly.
Common Myths About Disc Brakes
Myth 1: Bigger rotors are always better
While larger rotors can provide more stopping power, they also add weight. It’s all about finding the right balance for your riding style.
Myth 2: Disc brakes are maintenance-free
Silly myth! Like all bike components, they need care and attention to keep them working efficiently.
Myth 3: All disc brakes are created equal
Not even close! Different types (e.g., hydraulic vs mechanical) offer distinct advantages and disadvantages based on your riding conditions and style.
Final Thoughts
Adjusting your mountain bike disc brakes might seem daunting at first, but with a little practice and these steps, you’ll be a pro in no time. Your confidence in your braking system allows you to focus on what really matters—the ride. So go ahead, tune those brakes and tackle some trails!
Happy riding and remember, good brakes can lead to great adventures!


